Home About Press Crafts Recipes

Thursday, July 28, 2011

Recipe: Quinoa Tabbouleh

Recently I received a comment on the Lego party post that read,"omg these dishes look super tasty.. I d love to know the recipes :) Jean ". Thanks for asking Jean, here's one of the recipes from the party, Quinoa Tabbouleh. It's a fresh tasting healthy dish that's great for summer. It can also be made the day before. The other dishes I had made for the party were Shell Pasta Salad and Sweet Potato P0blano Salad. The main dish was sandwiches from our local deli.

Quinoa Tabbouleh Recipe
(recipe from Auntie Susan)
Ingredients:
2 Cups water
1 Cup uncooked quinoa
1 pinch salt
1/4 cup olive oil
1/2 tsp. sea salt
1/4 cup fresh squeezed lemon juice (if using bottled lemon juice start with 2T and add to taste)
3 tomatoes, diced
1 cucumber, diced
2 bunches green onions, diced
2 carrots grated
1 cup fresh parsley, chopped

1. In a saucepan bring water to boil. Add quinoa and a pinch of salt. Reduce heat to low, cover and simmer for 15 minutes. Allow to cool to room temperature; fluff with a fork.

2. Meanwhile, in a large bowl, combine rest of ingredients and stir in cooled quinoa. Enjoy.

Wednesday, July 27, 2011

Kawaii Comic: Mameshiba On the Loose!

Have you ever heard of Mameshiba before? They're cute little bean dogs that like to share random bits of trivia. I had seen the videos and stuffed animals before but never the comic book until I stumbled upon it at the Kinokuniya Book Store. I decided to pick up a copy for my son since he's really into comics. Plus, I always find it challenging to find a comic book that is age appropriate for an eight year old. Thought I would share since this is such a cute read and the price isn't bad either ($7) .

Here's a couple pictures of the book below.

List of characters in the book with pictures and descriptions


Cute right?

Monday, July 25, 2011

Coin Purse made with Yogurt Lids

LinkA while back I found a clever tutorial for making a coin purse out of yogurt lids. I finally got a chance to try out the project and was pleasantly surprised how easy it was to make. All you need is two large plastic yogurt lids and some fabric. You can find the complete tutorial on the blog Idle Hands Empty Brain. The pictures for the tutorial are small but when you click on the photos it will enlarge them.


Squeeze pouch to open.

Thursday, July 21, 2011

Featured In Parents Magazine

The other day the August issue of Parents Magazine came in the mail. I had been waiting for this issue longer than you can imagine. I tossed the Martha Stewart magazine out of the way and started rifling through the Parents issue. I shushed the kids, "Quiet!, I'm looking for something". And then I found it, the craft project I created for the magazine on page 168. "Look", I said to the kids, "my craft project with my name is in the magazine". I show them the picture. And then in a very casual way my son says, "What? Like you've never been in a magazine before?" as if it's some common thing and no big deal. I think to myself "like you have?" but being a good mom, I just smile and say no.

And there you have it, before any kind of ego could possibly form, I had been humbled . . . . . .by an 8 year old.

If you get a chance, please check out the magazine. I created a summer craft for preschool age kids.

Tuesday, July 19, 2011

Piccolo: Japanese Kid Craft Magazine

ISBN# 4910076390614

I recently discovered one of the cutest Japanese magazines, Piccolo. Piccolo is a magazine filled with crafts, games, stories, and decoration ideas for kids (mainly preschool age). The entire magazine is in Japanese but because it is picture heavy, the crafts are easy to figure out. Although, there were a few things I wasn't sure about so a friend translated them for me.

Below are some pictures from the magazine. I wish I could share all the pages with you, it's that cute! I think this is going to be my new obsession. I already want a subscription. . . hmm, wondering if there's an economically friendly way to do that. This magazine cost me $18 alone, which is a little pricey.

In this issue of Piccolo, a lot of the magazine is focused on crafts for the Japanese festival, Tanabata. Tanabata is held on July 7th to celebrate the meeting of the deities Orihime & Hikoboshi. Apparently only one day out of the year (July 7th) they are allowed to meet. I'm told the celebration consists of decorations hanging from bamboo. In the picture above there are hanging decorations you can make for the festival. The magazine has all the templates for the images. It even comes with a CD for patterns.

These are crafts projects that represent the star prince and princess (Orihime & Hikoboshi).


Another craft I think? I forgot to have this translated so I'm not sure why they're filled with liquid. I don't know if it's for drinking or decoration. But you've got to admit, these have to be one of the cutest uses of plastic bottles.


A craft/ hide and seek game.

Sunday, July 17, 2011

How to Make an Oversized Friendship Bracelet

In case you haven't noticed, the friendship bracelet is back. And surprisingly, nothing has really changed about it. From the fashion pictures I've seen, they're the same old bracelets I wore in grade school. So, I decided it might me nice to make an oversized version of the bracelet. Instead of using the the traditional material of embroidery thread I used cotton yarn. The yarn gives the bracelet a chunkier look and it also allows you to make them much quicker. And may I add, it's a nice little stash busting project.

The method I'm using to make the bracelets is the exact same way I used to make them in the 5th grade. My instructions are slightly different than some of the tutorials you might have seen online. There are really many ways to make the bracelets. It's really all about preference and personal style.

Supplies:
Cotton yarn in various colors
Scissors

To get the correct length of string for you wrist, wrap the yarn around your wrist loosely three times and then add a couple more inches for good measure. Now take that string and double the length.

Cut as many pieces as you wish to use. I used 5 in the picture above which yields 10 strands.

Line up all of the yarn. Fold in half and tie a knot in the center to make a loop the circumference of your finger. Refer to picture.

Tape loop down or hook it onto something to keep the bracelet from moving while you make it.

Line up your string in the order you want your stripes to go on the left hand side. On the right hand side mirror the colors. So for this bracelet it should be blue, white, purple, pink, orange, orange, pink, purple, white, blue (it's not lined up in the picture).

Starting with the string on the very left, tie a knot around the white string. Refer to picture.

Here's a close up of the knot. Now you're going to slide the knot all the way to the loop you made earlier. Now repeat this knot on the purple, pink and orange string.

It should now look something like the picture above. When you first start the bracelet it always looks a little wonky. The farther along you go, the better the stripes will look.

Now you're going to take the string on the very right side and tie a knot on the string next to it. Continue to do this until you get to the center.

*Make sure the knot is just like the picture above.

Tie both blue strings together and slide to top.

So now once again you will start with the outer left hand side string and proceed to make knots on each piece of yarn until you get to the center. Then take outer right hand side string and tie knots on each string until you get to the center. Tie both pieces in the center together.

As you continue the pattern your bracelet should start to look like the picture above.

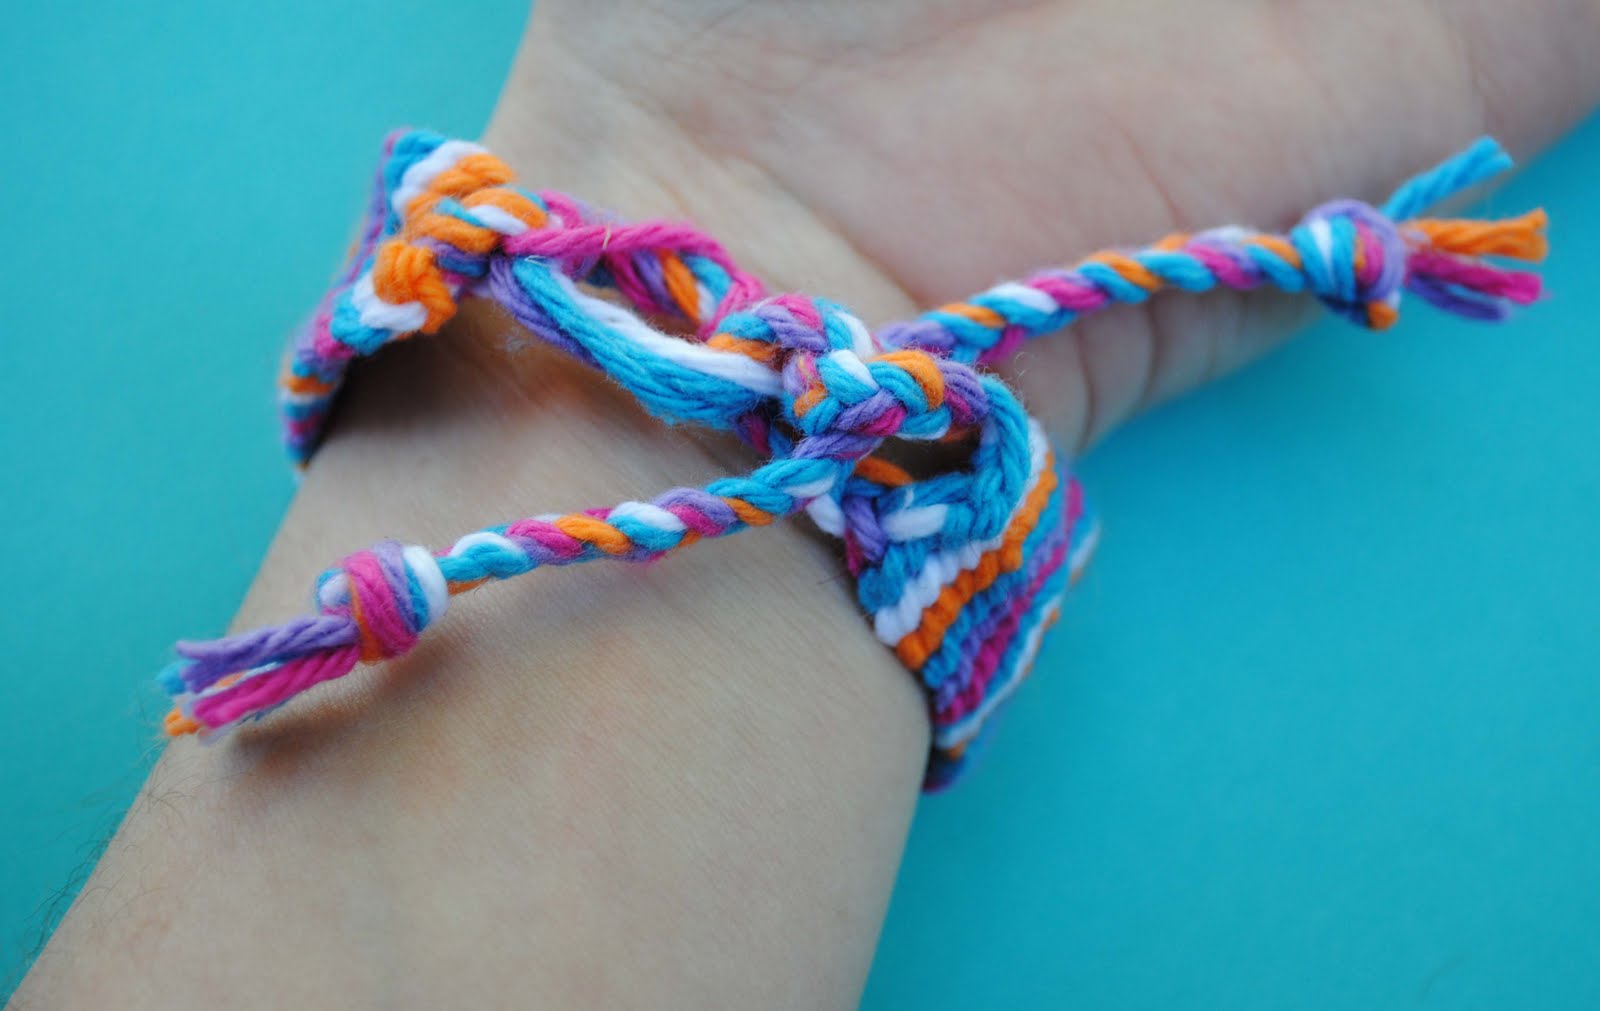
Once you get your bracelet to the desired length, make two braids as shown in the picture above.

To tie on the bracelet, take one braided string and thread it through the loop and then tie both braided pieces together.

Six pieces of yarn were used for the bracelet above which yielded a inch in width. The more strands of yarn you use, the wider the bracelet will be.

If you have any questions about the bracelets, I will try to answer all questions in the comments.

Saturday, July 16, 2011

Winners of the Creativity for Kids Giveaway


Congratulations to MommyBee & Just Jayma who won the giveaway!

Thank you to everyone who participated. You guys came up with some great monster names.
Zakka Life has moved to a new site!

Click here to visit the new site.