



Home About Press Crafts Recipes
Showing posts with label wedding decorations. Show all posts

Monday, February 20, 2012

Craft: Wine Cork Vase

Today I've got a quick craft tutorial for you, wine cork vases. They're easy to make and only require a few supplies.

I can imagine these miniature vases adorning a table for a wedding. Sometimes I wish I had a wedding to plan simply for the crafting/decorating part of it. Maybe I missed my calling, party planner. But then again, I'm way too greedy with my weekends. I want them all for myself and family.

Supplies:
Wine cork
X-Acto knife
Small plastic vial - I used a plastic vile from a bubble container. The kind you find in the wedding section of the craft store.
Small craft saw

1. Soak wine cork in water overnight. This will prevent the cork from falling apart when you carve it.

2. Hollow out a hole in the center of the cork with an X-Acto knife. This takes a little time and patience. It took me about 10 minutes to carve out the hole.

3. With your craft saw, cut plastic vile to fit in cork.

*Don't have a bubble container on hand? Look around your house to see what else you could use. The plastic containers seed beads are packaged in would work just as well. Another idea would be caps from skinny markers. Check the junk drawer and get creative, you're bound to find something. Where there's a craft will there's a way.

4. Place plastic vial in wine cork, fill with water, and add a flower.

*Because the vases are so light, I recommend placing a removable glue dot on the base to prevent them from falling over.

Saturday, November 26, 2011

Black Tie Friday

I did something a little unconventional for Black Friday this year and attended a Black Tie Wedding. It was held at Casa Real at the Ruby Hill Winery, the perfect setting for a wedding. We enjoyed the night with good food, wine, conversation and some dancing.

This is the dress I wore to last night's wedding. This picture is actually from a wedding we attended at the Old Mint in San Francisco on new years eve. We basically looked the same, just maybe a little older now.

Normally I like to spend Black Friday decorating the house for Christmas. For whatever reason, I've never got into going shopping on that day. How about you? Do you like to go shopping for the deals? Anyone go shopping at midnight or stand in line for a day? Please share your stories in the comments.

Tuesday, September 8, 2009

Personalized Party Eating Utensils

Eat, drink, laugh and be merry with these fun eating utensils. They're easy to make and guaranteed to add a personalized touch to any party. Simple directions below.

Supplies:

Standard wood burning tool - can be found at most craft stores

Bamboo Forks - I purchased a set at Daiso, 10 for $1.50. If my memory serves me right, they also had spoons and knives.

With a pencil write out a word on the handle. If the spacing doesn't look good just erase and start over. Now just take the wood burning tool and trace over your word. Done.

* I recommend practicing on some scrap wood first to get a hang of the wood burning tool.

Party Ideas

Use utensils to double as place cards for your guests.


Let your serving utensils do the talking by functioning as food labels. This would work best with small items such as hors d'oeuvres.

Tuesday, July 21, 2009

Delightful Candy Favors

A while back I fell in love with these cupcake liners and new I had to create something with them. After playing around with them for a while this is what I came up with, candy favors. I'm thinking they would make delightful wedding favors? Almost makes me wish I had a wedding to plan. Simple directions below, as usual.

Supplies:
*cupcake liners - you need a strong cupcake liner that can hold the weight of the candy. I purchased mine from Bake it Pretty.
*double stick tape
*toothpicks
*paper
*tape
*scissors

1. Tape two cupcake liners together using double stick tape.

2. Tape a strip of paper to the top of a toothpick.

3. Fill the cupcake liner with candy. Place the toothpick flag inside. If the toothpick flag doesn't hold up well poke it through the bottom of the cupcake liner. Done


Sunday, July 12, 2009

Craft Project: Table Centerpieces

A couple weeks ago I mentioned I was busy at work making tissue flowers for table centerpieces. Above is a picture of all my hard work. They worked out perfect for the event. I made the centerpieces for long rectangle tables. And maybe it's just me but I find long rectangle tables are always the trickiest. Round tables on the other hand are easy. You create one tall centerpiece and it's done. But with long tables you have to fill the space. Anyone else feel this way? Anyhow, below are simple directions on how I made the arrangements.

Supplies:
Tissue Flowers
Glass Vases - I purchased mine at Target but you can find them at Michaels, dollar store, etc.
Curly Willow branches - I purchased mine through a local wholesale florist shop but you can also find them at craft stores or the farmers market. They're very common.
Glass half marbles
Washi paper - any decorative paper will work
Removable Glue dots
Hot Glue

1. Cut paper to size. Wrap around vase and adhere with glue dots. The reason I used the glue dots was so I could remove the paper after and reuse the vases.

2. Cut four branches to desired length. Arrange branches, hold in place, drop glass marbles into vase to hold branches in place. This will also prevent the vases from tipping over.

3. Hot glue one tissue flower to each branch. For each vase I used four tissue flowers. It added just enough color. Done.

I was able to take this single picture amongst the craziness of setting up. Sorry it's not that good. To lengthen the table and add color I used Hallmark's textured gold wrapping paper. No one even knew it was wrapping paper, it looks that good. I placed to vases on each table. With the remaining washi paper, I used a sakura flower punch and sprinkled the flowers along the gold runner.

*Side note - Last week I mentioned I would be sharing a chicken recipe, I'll be posting about it Wednesday.

Monday, June 29, 2009

How to: Tiny Delicate Tissue Flowers

This is what I've been up to lately, making these delicate tissue flowers. The flowers will be glued onto contorted willow branches as part of a table centerpiece (providing all goes well). I'm really happy with the results, light, delicate & airy. Perfect for summer decorations.

Supplies:
tissue paper
scissors
string - waxed dental floss works well


Layer four pieces of tissue paper together measuring at 2 1/4" by 3 1/2". Fold together using an accordion fold (refer to picture).


When you're finished with the accordion fold, it should look like the picture on the left. Pinch together and place on its side. It will now look like the picture on the right. Cut where yellow lines are shown, through all layers.


Your tissue flower should now look like the image on the left. With string, tie a loop around the center of the tissue where you made the slits. Now unfold tissue.


Pull the first layer up. Begin to peel all four layers apart (picture on right). Now peel all the layers from the other side. Done.

Sunday, May 10, 2009

How To Make Paper Lanterns

The inspiration for these paper lanterns came from the lanterns I saw on Bloesem. I liked the unexpected print and began to wonder what else would look good. That's how I came up with using doilies for paper lanterns. I could picture these hanging in trees all lit up on a summer's night. Perhaps for a wedding, a party, or just because. Directions below.


Supplies:
Square or rectangle doily - The size of the doily I used is 10" by 14.5" (placemat size). I purchased mine at the party supply store. Sometimes I see them at the dollar store as well.
Scissors
Double stick tape or glue

This is what the doily looks like starting out. Optional, you could sponge them with water color for extra color.

Cut the sides off.

Fold in half. Cut slices just before the doily part starts. The slices are about an inch in width. You can click on the image to get a better view.

Unfold after cutting. Roll into a cylinder. Glue or tape shut. I tried both ways and I preferred using glue. Done.

If you plan on having the lanterns on the ground, I recommend using a tall glass vase to hold the candle. The doily is a little flimsy so the tall vase supports it well. You might even want to use glue dots to adhere part of the lantern to the vase. You can find glue dots at the craft store. I found the vase at Target ($1.50). I used an electric tea light which I purchased at the dollar store (2 for a $1). I recommend using these because it's easy to drop into a tall vase and you don't have to worry about a fire if one tips over.

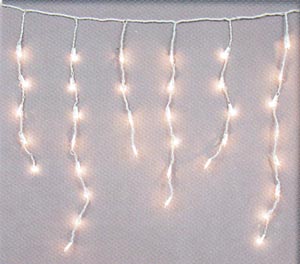
If you want the lanterns lighted while hanging, place them over icicle Christmas lights.

Friday, April 17, 2009

Wedding Aisle Decorations


Thought I would share with you what I've been up to for the past two weeks. I've been busy making these wedding aisle decorations for my sister in law's wedding. You might remember these flowers from the post, here. The flowers are about the size of my hand and are sewed to some cream ribbon. The wedding is this Saturday so I hope they work out (keeping my fingers crossed).

sneak-peek of the dress I'll be wearing to the wedding. I usually stick to solids with texture for dresses but decided to try something new this time. We'll see how it goes.

* There's still time to enter the Crobots (crocheted robots) book giveaway, here.

Monday, August 18, 2008

How to Make Doily Flower Cubes

Last week I had shared about the doily decorations I made for my Sister in Law's engagement party. Here's the tutorial as promised.

Supplies:
circle doilies with a diameter of 8 inches
scissors
tape
glue
tissue paper

Directions

First you will want to make six tissue flowers, directions here.

Make a cut to the center of the doily, refer to picture.


Bend into a cone shape and tape to secure. The angle of the cone should be somewhere between 90 - 120 degrees. Make six cones total.

Glue two cones together like the picture above. Try to match up the scalloped edges while gluing. Make a total of two of these.

Glue the two halves together that you just made in the last step. Your cube should now look like the picture above.

Glue a cone into the top of the four cones. Your cube should now look like the picture above. Flip over and glue the last cone into the bottom of the cube. At all times try to match up the scallops. Last, glue a tissue flower in the inside of each cone. Done.

Happy Engagement Danny and Akemi!

Friday, August 15, 2008

Engagement Party Decorations

I was asked to make decorations for a surprise engagement party and this is what I created for the party, doily flower cubes. They came out quite nice and I feel like the pictures just don't do them justice. Next week I'll be posting directions on how to make them.

For the banner I just glued letters to small doilies and strung all of them on pink ribbon. To hang the cubes I used fishing line. If you find yourself decorating for parties often, I recommend investing in some fishing line. I'm always finding new uses for it.

Tuesday, August 12, 2008

How To Make Tissue Flowers

I currently have a project underway that requires tissue flowers. You'll find out more about that Friday. But for now, I thought I would share how to make tissue flowers. I know there's many ways to make them but this technique seems to work best.

I had planned to show a flower I made with the accordion fold method (for comparison) but my son got to it first. He was dipping it in his juice and pretending it was peeing. Apparently he has my creative spirit.

Supplies
tissue paper - any color
scissors
tape or florist tape


Cut two layers of tissue paper into a circle. My circle is about 8 inches in diameter but any size should do.


With both layers together, fold in half.


Fold tissue over (refer to picture) and pinch at the bottom.


Still holding the flower at the bottom, separate the layers at the top of the flower (refer to picture).


Begin to roll the flower in the same direction you made the first fold. Make sure to keep the fold loose.


Once it's rolled into the flower shape, fold back the outer layer to resemble a flower. To get the shape you want, it might take a little finessing. Just remember it's an organic shape so you really can't go wrong.


Tape the bottom of the flower so it does not unravel. Done.


Zakka Life has moved to a new site!

Click here to visit the new site.